
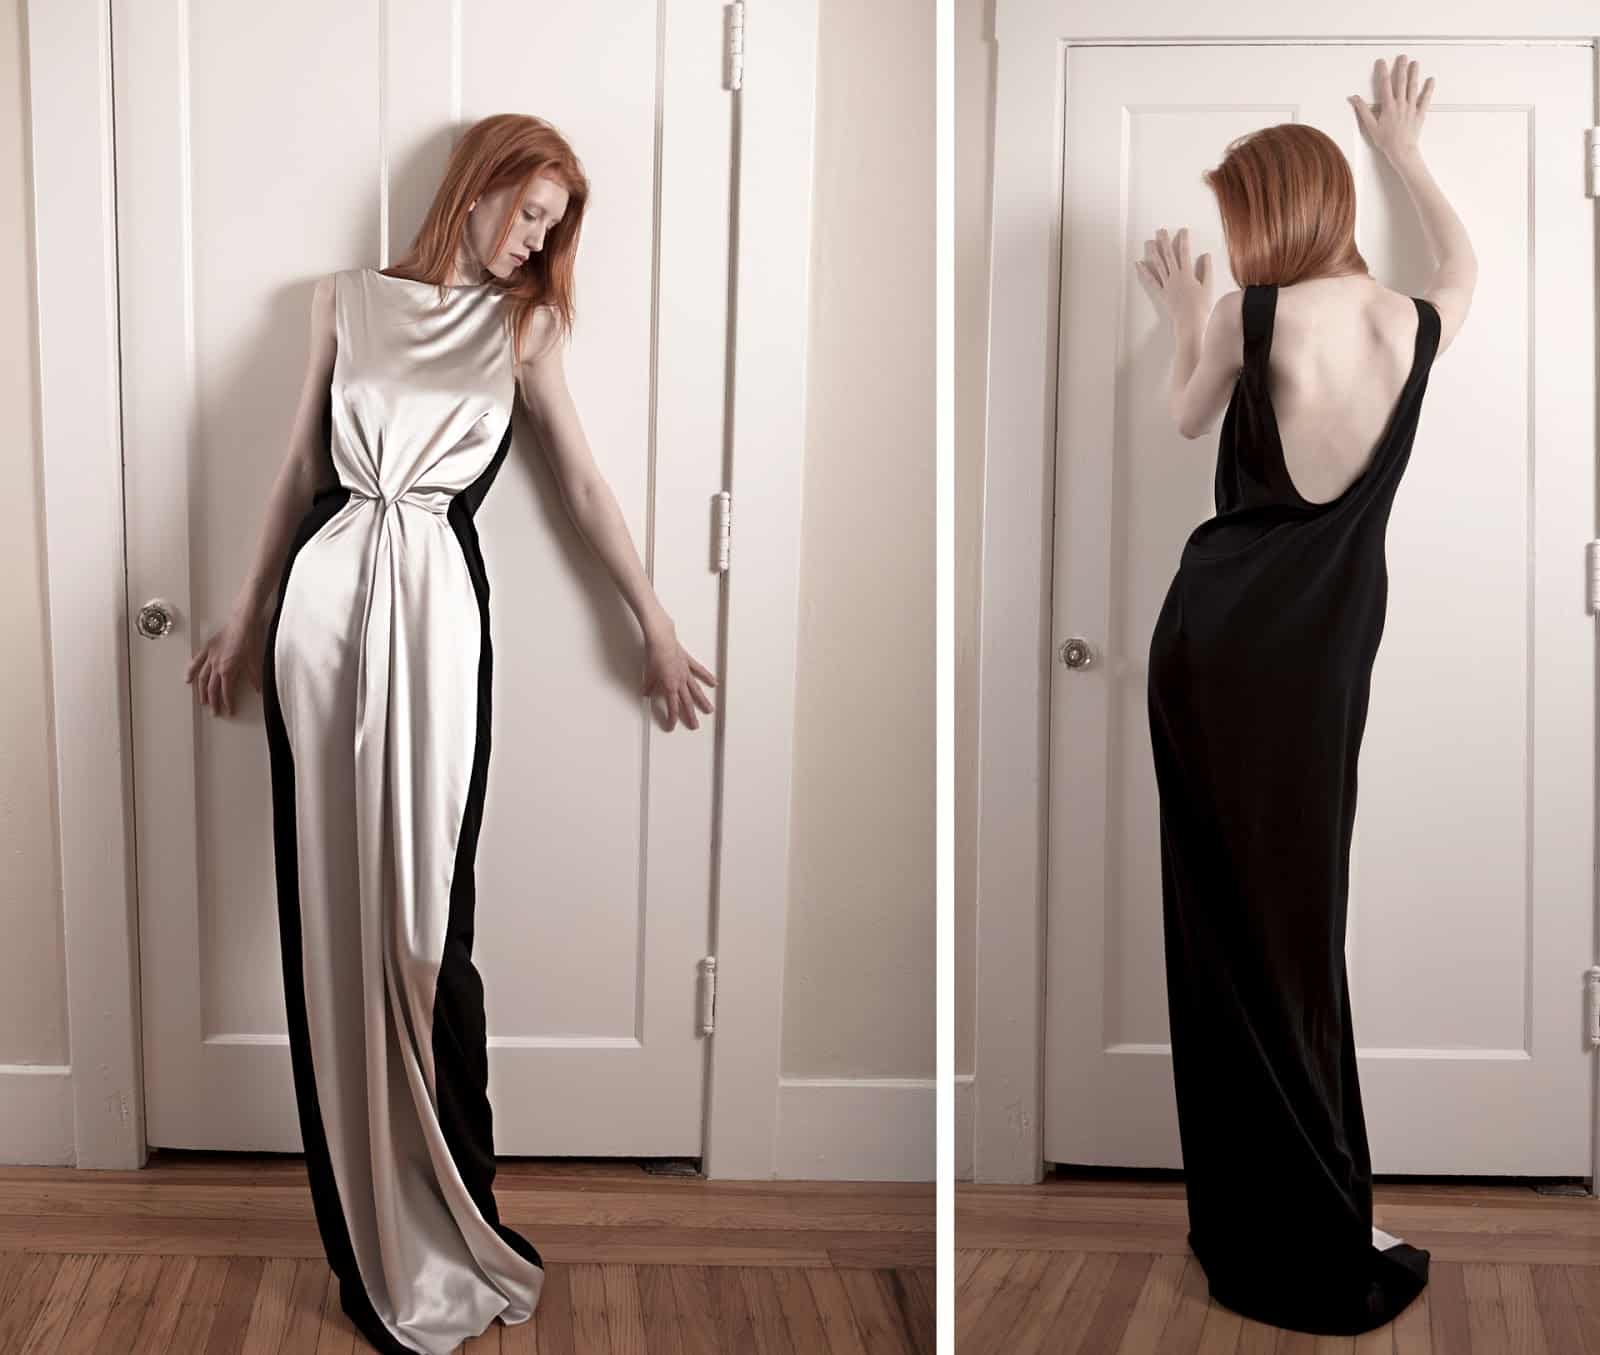
Knot Draped Positive/Negative Space Dress
It was my first few months exploring creative draping, and during that time I was also so much into art principles, especially ‘Positive and Negative Space’.
Positive and Negative Space is one of the composition rules, which also plays with the viewer’s perception or creates optical illusions.
Basically I came up with the design to create an illusion of the ideal body without force, or restricting the body with any type of corsets. The dress had no zipper, no fastenings that can be seen, and can be worn like a tee-shirt. There are only two seams and two pieces of fabrics that are contrasting in colors.
My design was shaped while I was working around the knot technique on a piece of fabric and after taking it to the stand to drape and shape around the body.
I didn’t design prior to draping on the stand.
I placed a large knotted fabric piece on my dress form, and after pinning from shoulders down, I decided on the placement of the knot on the body — I placed it on the center front waistline.
I also decided on the placement of the shoulder and neckline, so I pinned these three areas.
Waistline, shoulders and center front.
After attaching the fabric straight on the dress form, I started to draw an hourglass silhouette on my muslin piece, without forcing or changing the drape of the front fabric piece.
Then I pinned another large muslin from the back shoulders and let it hang naturally.
I pinned around the shoulder and started to shape the black piece around the armhole and underarm. I took the side of the back piece and instead of ending on the side seam I brought it to the front & met the intended seamline of the front muslin piece.
I continued to wrap the side of the fabrics to the front piece little by little downwards; waist, hipline to the floor.
The design was shaped and pinned. Later I drew my guidelines on the muslin pieces of front and the back, so I could take it to the table and turn it into a pattern.
I decided on black and silver white, matte and satin. The fabric was Silk Crepe Back Satin, and I used the satin side on the front piece and the matte crepe part on the back piece.
The steps were so easy and fast;
Made a knot technique on the front piece,
Sew the side seams with french seam,
Attached the facing to clean the necklines and armholes of the front and the back,
I cut the hem, and finished with baby hem (I know, the dress is a little long for this model).
Now, I needed the waistline of the dress to sit fitted around the waistline, but I didn’t want to lose the drape of the back piece.
So I decided to create a waist stay ribbon attached to the inside of the dress that held two sides of the front knot detail on the center front of the waist. So as much as the dress moved freely and draped loosely the front knot detail stayed on the waist and created that hourglass illusion.
Nothing is visible from outside.
I made this dress in 2010.
I hope this is helpful and/or inspiring.
And I’d gladly answer any questions you might have!
Cheers 🙂
