
Vionnet-Inspired Bias Dress
I was obsessed (and still am! :)) with Madeleine Vionnet and her master works.
It is so encouraging and powerful to see some women who changed the technique of dress making and created the whole new era and style in fashion, which is mostly led by men(which is fine, but we need to know our visionary women in this industry too).
So as I get a chance I love to get inspired by their work and create something and share the process with you.
I decided to come up with a design that was inspired by one of her designs.
It was my first try using draping tape technique to design and cut a bias dress on the dress form.
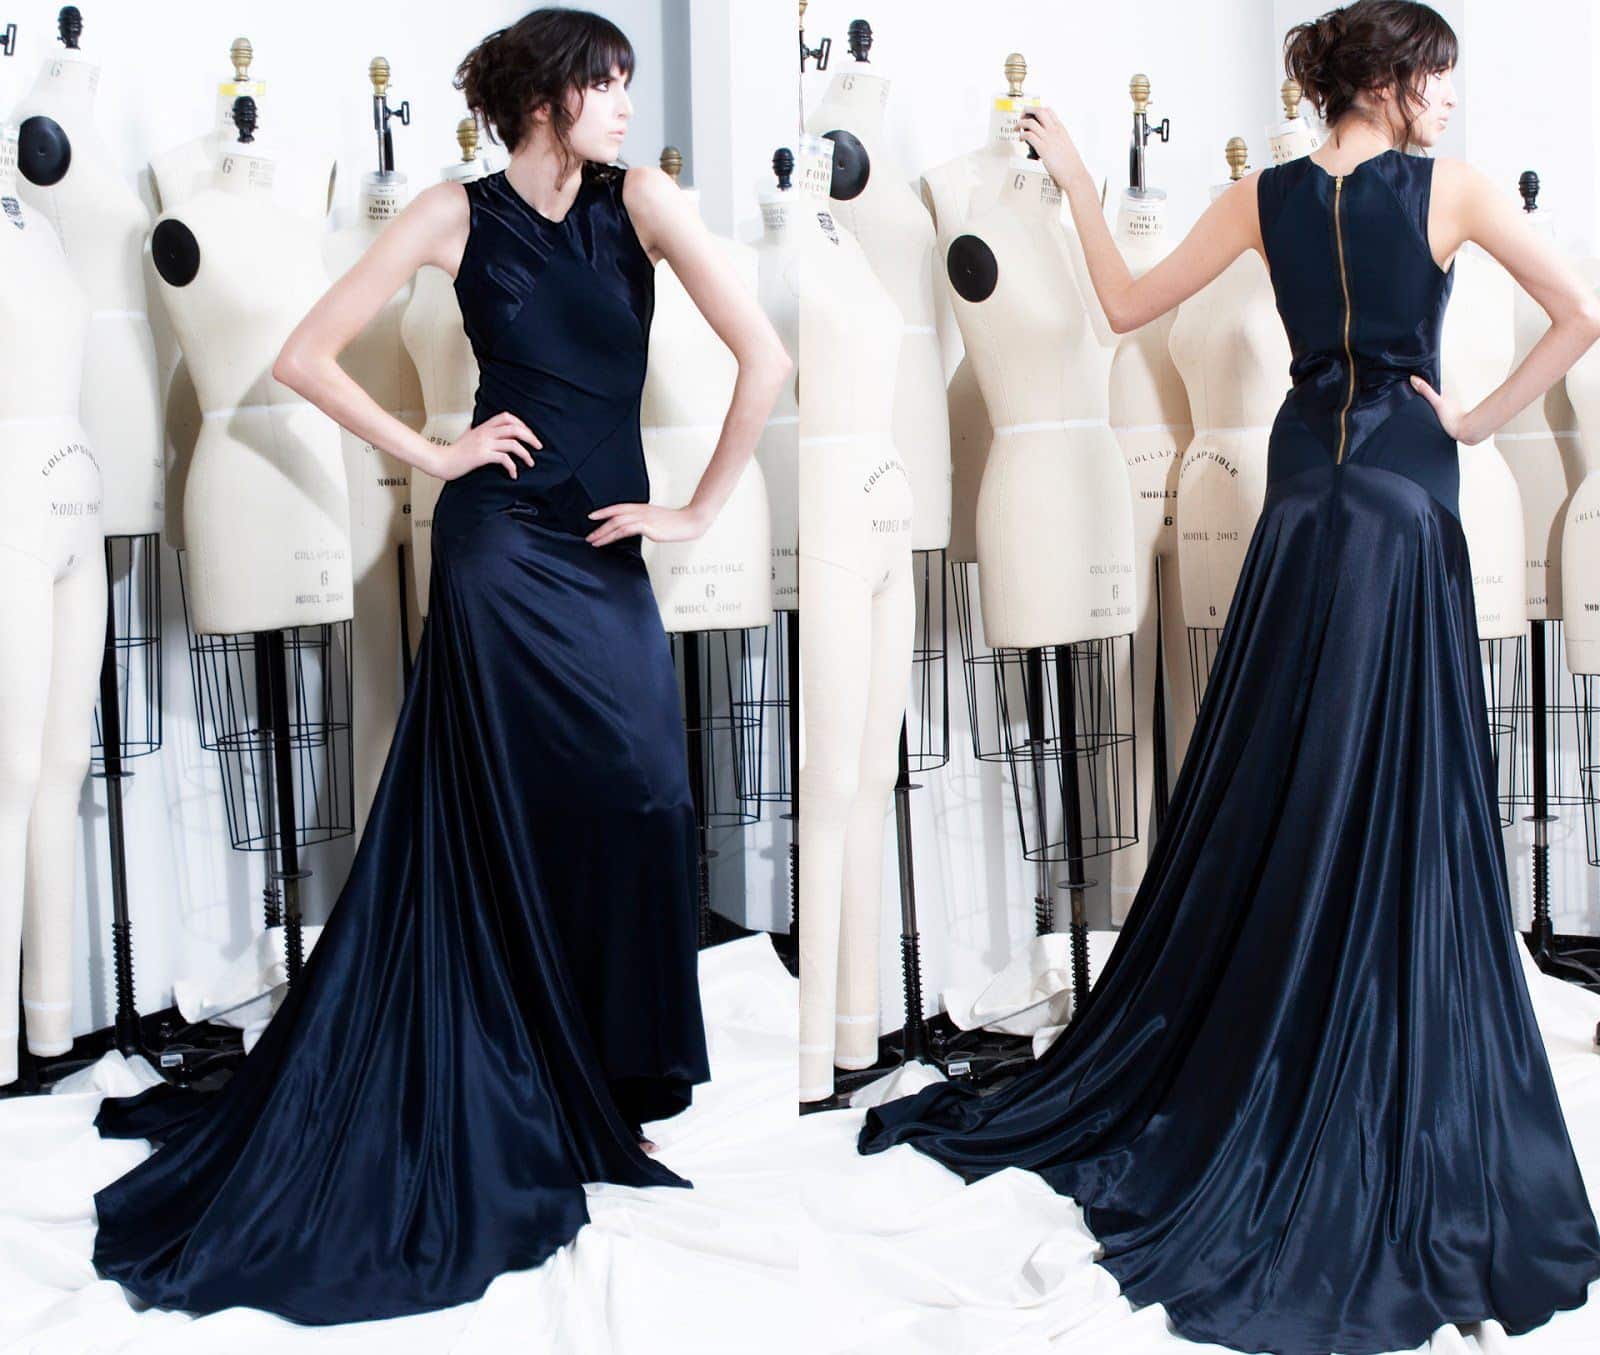
The shaping in this dress is accomplished by seams.
Each line becomes a seam on the bodice, and is also part of the design. So the first step is to tape the stand, and this is when the design process starts. I wanted some diagonal lines, diamond shape and triangles. I wanted to create a simple neckline and simple sleeveless look, to draw attention to the cut details.
Once the style lines are established, I used Voile to drape on bias at first to figure out the design problem, before I turned it into a pattern.
I used the bias of my muslin/Voile on individual pieces that are pinned to the form along the seam lines.
Each piece of fabric has to be carefully checked to make sure the grainline of the fabric lines up parallel to the center front and the center back on the form (which are on a real bias line) in order for the bodice to shape correctly.
Unless the design is asymmetrical, we could only drape one side of the dress form to guarantee the same look on both sides of the finished garment, but here I only draped the center front as a whole piece.
Because I don’t like to fold my muslin into half on bias, to cut or to drape.
For me it needs to lay flat for both.
I drew the bias line reference on each piece of muslin I used, in order to make it easier for me to keep the bias line aligned with the center front.
After transferring each piece to the dotted paper, all of the seams have to be trued, grain lines drawn, seam allowances added, and more importantly, matching pieces are numbered, labeled and notched to make it clear when the pieces are assembled into a garment.
Steps of placement of my bias cut voile are:
- I centered my bias line on the center front of the bodice and pinned around the taped design, then I drew the taped lines with a pencil
- I continued with the side triangle piece on the sides of the bodice, I centered the bias line on the side seam
- And then the lower V on the sides below the side triangles. I centered my bias line on the V.
- Next the center back piece; I made the bias line parallel with the center back line and draped it.
- The last piece which starts from the front neck shoulder wraps around the waist and creates the triangle shape at the center back, I draped the piece aligning my bias line at the front from bust to the shoulder.
After draping each piece, I drew the lines of the seams, cut the excess fabric and I hand basted pieces together and checked for any correction needed.
After examining the hand basted bodice on the dress form, I turned the draped sample pieces into patterns for the bodice first. Later I cut the first sample pieces with 4ply polyester crepe back satin in dark blue color (The one in the picture. Yes it is a sample dress)
Now it was time to drape the skirt.
I draped the skirt on the stand with my 4ply Polyester Crepe back Satin, because the drape and the weight of the fabric had to be examined to be able to decide on the drape. But for the first try, I draped it in a shorter version, as knee length, and after finalizing, I cut it in a floor length skirt.
Altogether there are 11 bias draped and cut pieces, 9 for bodice and 2 pieces for the skirt.
To make the seam lines more visible I used the front and the back of the 4ply Crepe back Satin.
Draping the Skirt
I later draped the skirt in different versions, which I will explain in here too.
I used 3.5 to 4 yards of the fabric for each side of the skirt, altogether 7-8 yards which is very close to 6-7 meters.
I started aligning the selvage/straight grain on the center front.
I controlled the drape of the skirt by cutting and opening small cuts to create flare wherever I wanted.
By this technique I gave most of the flares and curves to the back starting from the sides, and keeping the center front to the first diagonal line of the triangle straight without any flare, and finished the center back on the straight grain as well.
Later I reproduced this gown many times, in different versions of skirts and necklines.
The most common one, I placed the sewn bodice on a half circle skirt, and pinned it from the lines of the bodice, and cut the top half of the skirt. This was the most common technique my seamstresses used after sewing the bodice pattern for off-the-rack buyers.
I draped the skirt only if there was a customer who needed a controlled drape for her body (for example if she requested to make her hips look smaller, then I gave most of the flares to the front and the back and kept the sides with less flares)
Sometimes I had to keep the skirt simpler and use less fabric for very petite clients, because too much fabric can drown their body into a pile of fabrics. It’s not a good look.
This dress would not need a zipper if the neckline was wider, it can stretch beautifully.
But I added a zipper because most of the time it’s much easier, especially with hair and makeup on.
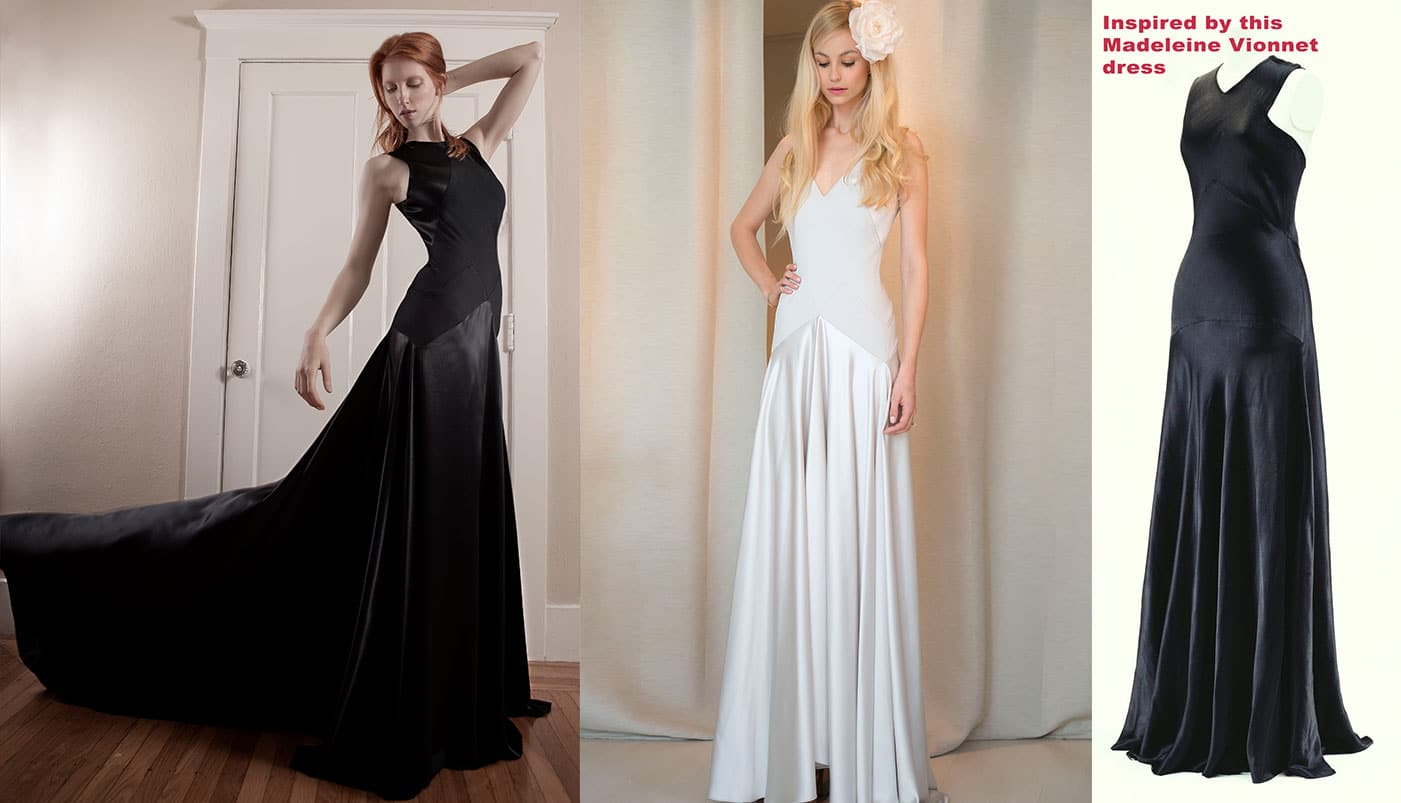
I’m adding another sample picture of this dress below as well.
That has a better view of the dress from the front.
It has a V-neck and a different type of skirt.
For that skirt I used a half circle fabric at the front, and two half circles meeting at the center back, and starting from the V of the front/sides.
Another point about bias designs is that the fabric on the bias stretches over time due to gravity.
After draping a bias design, you should wait at least 24 hours before cutting hems, to allow the fabric to settle. Otherwise you can get uneven, droopy hems.
I made the Dark Blue dress in 2009,
I made the Silver one in 2016 with Silk Viscose, Crepe back Satin.
I also wrote a more in-depth blog post about Madeleine Vionnet & her works.
If you’re interested in learning more & seeing her works, click here to check it out!
I hope this is helpful and/or inspiring.
And I’d gladly answer any questions you might have!
Cheers
